3 posts tagged with "Process"

Process tag description

View All Tags

Pinia for State Management

· 3 min read
Zoe Laventhol
Full Stack Collaborator @ EuFMD

Using Pinia for state management in Vue apps

🍍 What is Pinia?

Pinia allows you to store data and methods (aka variables and functions) in a central way, and import them to different components throughout your app. This can simplify your code by importing and using variables and functions only in the components where they are needed. This avoids prop drilling and several layers of callback functions!

Here is the documentation. 📖

When to use it?

✅ Use Pinia to store any data and methods that need to be accessible across multiple components. Ex:

  • myData needs to be set in Component.vue, but displayed in SiblingComponent.vue
  • Component.vue needs to fetch data based on some action in that component, but SiblingComponent.vue needs to display, edit or remove the same data.
  • myData and otherData are rendered in different components, but are both used in a third component to calculate some outcome.

❌ Do not use Pinia for data that is only used temporarily, or in a single component. Ex:

  • Component.vue temporarily sets a selectedItem - some function is performed on the selected item, then it clears when a new item is selected.
  • Component.vue uses specificData that never needs to be passed to or used in other components.

How to use it?

Create a store 🏗️

First, create your store file and name it with this pattern: useExampleStore.js

  • i.e. use + YourStoreName + Store
  • so for example, for RMT's disease status data: useDiseaseStatusStore.js

Step-by-step instructions in comments below. You can look at examples in the codebase in client > src > stores.

// ******* STEP 1: import defineStore at the top *******
import { defineStore } from "pinia";

// ******* STEP 2: export your store, and after defineStore, give your store a unique descriptive name *******
export const useExampleStore = defineStore("example", {
// ******* STEP 3: define your data/variables in state *******
state: () => ({
myVariable: [],
anotherVariable: "I ❤️ Pinia",
}),

// ******* STEP 4: define your functions/methods in "actions" *******
actions: {
async myFunction(params) {
// your code...
},
anotherFunction() {
// your code...
},
},
});

// ******* THAT'S IT! Congrats :) *******

Use a store 🧤

Here’s a 🎬 how-to video

Process to use stored data or methods in any component is:

  1. In <script>, import:
    1. the correct store
    2. mapState if you’re using data/variables
    3. mapActions if you’re using functions/methods
import { useExampleStore } from "@/stores/useExampleStore";
import { mapState, mapActions } from "pinia";
  1. For data/variables, add a computed property in your <script>, and use mapState to destructure your stored data:
computed: {
...mapState(useExampleStore, ['myVariable', 'anotherVariable'])
},
  1. For functions/methods, use mapActions in your methods to destructure the stored functions. You do not need to include params, just function names:
methods: {
...mapActions(useExampleStore, ['myFunction', 'anotherFunction'])
},
  1. Then you can use as usual! i.e. Use the variables in your <template>, call the functions, etc., with the same syntax as if they were standard data or methods.
<div>
<select @change="myFunction(value)">
<option v-for="item in myVariable" :key="item.id" :value="item.name">
{{ item.name }}
</option>
</select>
</div>

Set up a testing environment

· 4 min read
Ioanna Papaioannou
Full Stack Developer @ EuFMD

Set up a testing environment with a fake or mock database to test your code without affecting production data.

Introduction

Set up a testing environment where you can use a fake or mock database to test your code without affecting your production data. This is a common practice in development to ensure that your tests are isolated and do not interfere with real data.

Here's a step-by-step guide on how you can achieve this:

I. Create the Database Dump:

  1. Open DBeaver and connect to the database hosted on Amazon Web Services (AWS).
  2. From the list in Databases, right-click on the database you want to dump.
  3. Go to Tools > Dump Database. This will open the database dump configuration window.
  4. Select the specific database that contains the tables you want to export. Check the boxes next to the tables you wish to include in the export and click on Next >.
  5. Choose the folder where you want the SQL file to be saved (e.g., your Desktop).
  6. In the File Name Pattern field, enter a name for your SQL file (e.g., DBeaver_dump.sql).
  7. Click START to begin the dump process. The SQL file will be saved with the name you provided in the chosen location.
  8. Once the MySQL dump is finished (you’ll see a message like: "Task 'MySQL dump' finished at Fri Sep 27 17:42:02 CEST 2024"), manually close the configuration window and confirm the file exists in the specified location.

**Note: If the process fails and the SQL file is not saved in the specified location, request the file from the team and proceed with the next steps.

II. Import the Dump into a Local Database:

1. Create a New Local Database:

  • Open your terminal and navigate to your project’s repository by using the cd command: cd /path/to/your/project/repository

  • Log in to MySQL with the command: mysql -u root -p

  • Create a new database by running:

  CREATE DATABASE local_database_name;

Replace local_database_name with the desired name for your new database. This will be the name that appears in your MySQL database list.

  • Exit the MySQL client by typing: EXIT;

2. Import the Dump into the New Local Database:

  • Import the saved SQL file (e.g., DBeaver_dump.sql) by running the following command:
mysql -u root -p local_database_name < /path/to/directory/DBeaver_dump.sql

Replace /path/to/directory/ with the full path to where the SQL file is located. For example:

mysql -u root -p local_database_name < /Users/yourname/Desktop/DBeaver_dump.sql

To check if it has been succesfull:

  SHOW DATABASES;
USE you_database_name;
SHOW TABLES;

III. Create a New Connection in DBeaver:

  1. Open DBeaver.
  2. Go to Database > New Database Connection.
  3. Select MySQL from the list of database types.
  4. Fill in the connection details as follows:
Server Host: localhost
Port: 3306
Database: local_database_name (the name in the MySQL database list)
Username: root
Password: YOUR_MySQL_PASSWORD

Replace YOUR_MySQL_PASSWORD with your actual MySQL password. You can choose whether to save your password for future connections.

  1. Click Test Connection to ensure everything is set up correctly.
  2. Click Finish to save the connection.

The .env File

The .env file is a local configuration file used to store environment variables in VSCode. It is typically included in the .gitignore file, which means its contents are not pushed to GitHub when you push your branch. This setup ensures that sensitive information, such as database credentials, remains private and is not exposed in version control.

When pushing your branch to GitHub, you don’t need to modify the .env file, as it is ignored by Git.

When connecting to the dump database, ensure that the database connection in your .env file is configured with the correct settings. For the dump database, the .env file should be modified as follows:

DB_HOST=localhost
DB_NAME=local_database_name
DB_PASS=YOUR_MySQL_PASSWORD

Switching Between Databases in DBeaver

To switch between databases, simply comment out the settings for the database you're not using in the .env file by adding a # at the beginning of the relevant lines.

Reverting to the original AWS database:

  1. Disconnect from the local dump database in DBeaver.
  2. Connect to the original AWS database.
  3. Open the .env file and uncomment the AWS database settings, while commenting out the dump database settings.

Before testing your connection and running your code, confirm that you're connected to the correct database. Look for the green tick mark next to the database name in DBeaver to ensure the connection is active and correct.


Running A Pilot

· One min read
Sophie Ogden
Software Engineer @ EuFMD

TOM is being piloted in a number of countries including Spain, Bulgaria and Switzerland.

For every pilot, we follow a series of steps to make sure that rollout is smooth for our newly-onboarded users.

1. Add new users

You will receive a list of new users from a specific country to add to the database.

For this we have the TOM Admin tool.

Login credentials are admin@eufmd-tom.com and tom@dmin22.

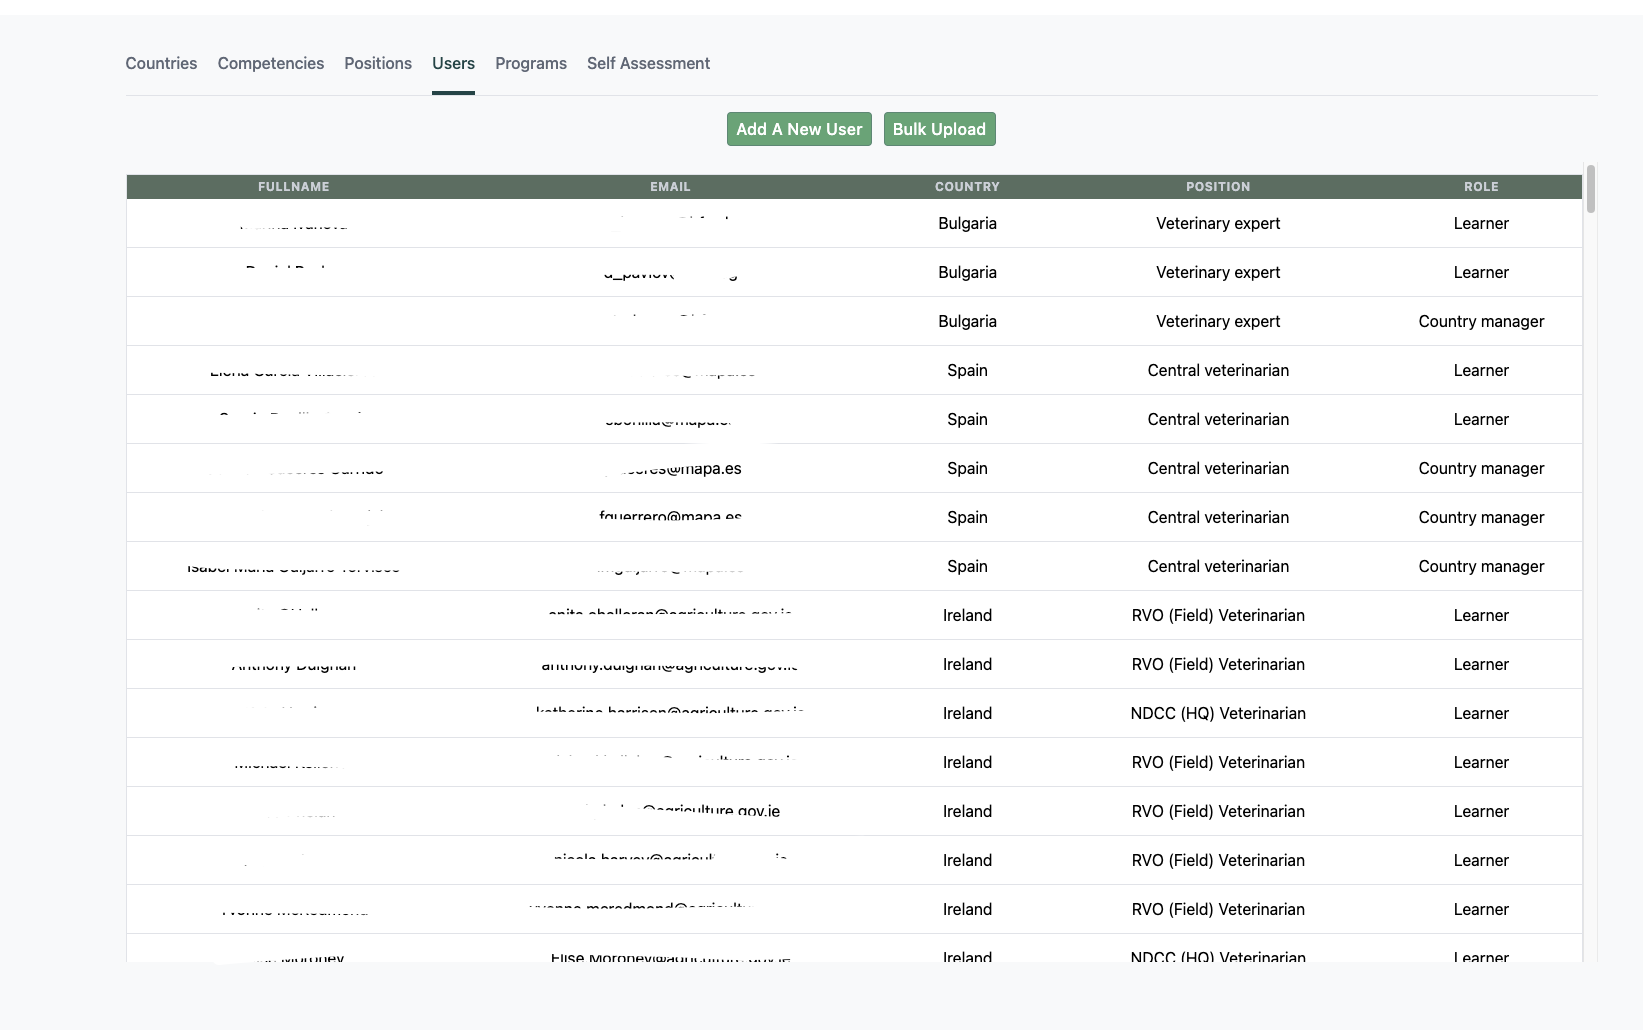
After logging in, navigate to the "Users" tab in the admin dashboard. Here, you will find a list of already registered users. These users are stored in the production database (db_tompilot), specifically in the users table. Instead of manually adding each user, the TOM Admin dashboard provides a user-friendly interface that automatically adds new users to the database.

tom admin user view