
MySQL Node Issues

· 4 min read
Sofia Moura
Full Stack Developer

Sometimes we encounter problems with MySQL version and the mysql package for Node.js. To address this issue, we need to touch both Node.js projects and MySQL versions.


The Problem

Some of you are using the CodeOp projects/activities as guidance. Currently, those projects use the mysql package, which does not support caching_sha2_password, the default authentication plugin for MySQL 8.0 and above.

Additionally, MySQL 9 (the current default version) does not include the mysql_native_password security plugin. This mismatch is causing errors during migrations and database interactions.


The Solution

1. Migrate to the mysql2 Package

  • mysql2 is fully compatible with caching_sha2_password and offers better performance.
  • Only one person needs to make the necessary changes. The rest of the team can simply pull the updated code after it’s committed.

2. Keep MySQL Updated

  • MySQL 9 uses caching_sha2_password for stronger encryption and better security.
  • Downgrading to older plugins like mysql_native_password would weaken security and is not recommended.

🍏 Steps to Update MySQL for Mac Users Using Homebrew

  1. Check Your Current Version
    Run the following in the terminal:
    mysql --version

  2. If it’s not version 9+, stop the MySQL service:
    brew services stop mysql

  3. Ensure Homebrew is up to date:
    brew update

  4. Upgrade MySQL:
    brew upgrade mysql

  5. Confirm the upgrade:
    mysql --version

  6. Start the service:
    brew services start mysql

  7. Test if MySQL is running:
    mysql -u root -p


🤖 Steps for Windows Users

  1. Uninstall MySQL 8 (if necessary)

    • Stop the MySQL Service:
      Open the Services app (search “Services” in the Windows search bar).
      Find MySQL, right-click, and select Stop.

    • Uninstall MySQL:
      Go to Control Panel > Programs > Programs and Features.
      Locate MySQL Server, right-click, and choose Uninstall.

    • Remove Residual Data (Optional):
      Navigate to the MySQL data directory, usually located at:
      C:\ProgramData\MySQL

  2. Install MySQL 9

    • Download MySQL Installer:
      Go to MySQL Community Downloads.

    • Run the Installer:
      Choose the Custom Install option.
      Select MySQL Server 9.x (ensure it’s compatible with your architecture: x64 or x86).
      Proceed with the installation.

    • During Configuration:
      Set the authentication plugin to caching_sha2_password.

  3. Start MySQL:
    Use the MySQL Workbench or run the following command in the Command Prompt:
    net start mysql

  4. Test if MySQL is running:
    mysql -u root -p

⚠️ NEXT STEPS FOR ALL USERS

  1. Open the MySQL command line:
    Run the following command:
    mysql -u root -p

  2. Update the authentication plugin for the root user:
    Run the following query:

    ALTER USER 'root'@'localhost' IDENTIFIED WITH caching_sha2_password BY 'YOUR_PASSWORD';```

After updating the MySQL version, update the package and some code in your Node/Express project. This step needs to be performed by one person, and the others can pull the updated code once it's committed.

  1. On the server terminal of your project:

Remove the MySQL package:

npm uninstall mysql

Install the correct package: npm install mysql2

  1. Replace MySQL import statements in your project files: In your code, replace: const mysql = require("mysql");

With: const mysql = require("mysql2");

Make this change in the files:

helper.js database.js

5.Update the helper.js file: Remove the if/else if statements after the con.query block (approximately lines 36 to 55):

    if (result.affectedRows === 0) {
results.error = "Action not complete";
console.log(err);
reject(err);
con.end();
return;
}
// Removed this line because it returns an array in an array when empty set
// results.data.push(result);
} else if (result[0].constructor.name == "RowDataPacket") {
// Push each row (RowDataPacket) to data
result.forEach(row => results.data.push(row));
} else if (result[0].constructor.name == "OkPacket") {
// Push the first item in result list to data
results.data.push(result[0]);
}

Before the con.end() statement, add the following line:

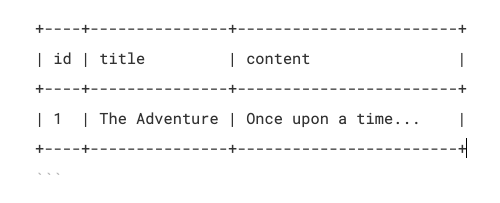
results.data = result;

With these updates, the rest of the code and the response structure will remain the same, so no further updates are required.

Upload Python Script to AWS Lambda

· 3 min read
Pilar Rius
Data Scientist @ EuFMD

Prerequisites

  • AWS account (request credentials to team lead)
  • Python script ready for deployment
  • AWS CLI installed and configured (optional but recommended)

Step 1: Create an AWS Lambda Function

  1. Navigate to AWS Lambda:

    • Go to the AWS Management Console and open the Lambda service.

      lambda console

  2. Create a Function:

    • Click on Create function. lambda function

    • Choose Author from scratch.

    • Function name: Enter a name for your function (e.g., MoodleDataProcessor).

    • Runtime: Select Python (e.g., Python 3.8). lambda function2

    • Permissions: Choose an existing role or create a new role with basic Lambda permissions. lambda function3

    • Click Create function.

  3. Upload Your Script:

    • In the function's configuration page, scroll down to the Function code section.

    • Under Code source, click Upload from and select .zip file.

    • Upload a .zip file containing your Python script and any dependencies. Dependencies:

    • If your script has dependencies, include them in a requirements.txt file and package them with your script. Dependencies are packages used on your script. Check what imports you have and add those package names into a txt file:

      dependencies

    • add the requirements.txt to the folder where the python script is and zip it. Then you can upload the zip file:

      lambda function4

Step 2: Set Up Environment Variables (Optional)

  1. Environment Variables:
    • Select configuration on the tabs and go to Environment variables section.
    • Click Edit and add any necessary environment variables (e.g., API keys, database credentials).

Step 3: Configure the Lambda Function

  1. Handler:
    • Ensure the handler is set correctly (e.g., lambda_function.lambda_handler if your main function is lambda_handler in lambda_function.py).

Step 4: Create an EventBridge Rule

  1. Navigate to EventBridge:

    • Go to the AWS Management Console and open the EventBridge service.

      eventbridge

  2. Create a Rule:

    • Scroll down and Click on Create rule. eventbridge2

    • Name: Enter a name for your rule (e.g., RunMoodleScriptEveryMonday).

    • Event Source: Choose EventBridge (CloudWatch Events).

    • Schedule: Select Schedule and use a cron expression to run the script every Monday. For example, cron(0 0 ? * MON *) runs the script at midnight UTC every Monday.

    • Target: Click Add target and select Lambda function.

    • Function: Choose your Lambda function (MoodleDataProcessor).

    • Click Create.

Step 5: Test and Monitor

  1. Test the Lambda Function:

    • In the Lambda function's configuration page, click Test.
    • Create a new test event and click Test to ensure your script runs correctly.
  2. Monitor Logs:

    • Use Amazon CloudWatch Logs to monitor the execution of your Lambda function and troubleshoot any issues.

Example Cron Expression

  • cron(0 0 ? * MON *): This expression schedules the Lambda function to run at 00:00 UTC every Monday.

Additional Tips

  • IAM Roles and Permissions: Ensure your Lambda function has the necessary permissions to access the Moodle API and the RDS instance.
  • Error Handling: Implement error handling in your script to manage potential issues during execution.
  • Notifications: Consider setting up SNS (Simple Notification Service) to receive notifications if the Lambda function fails.

By following these steps, you can automate the execution of your Python script on AWS, ensuring it runs every Monday without manual intervention.

Background Maps

· 3 min read
Pilar Rius
Data Scientist @ EuFMD

Set up background maps that are consitent with UN guidelines

Introduction

Whether you’re using Tableau, Power BI, Python, R, Leaflet, or any other tool or programming language in your web application at EuFMD and as a division of FAO/UN we have very specific guidelines on borders and naming conventions. Thankfully the geospatial unit at UN has provided a WSM ( a wsm/wsmt is a .... ) for applications to use. In addition all maps must display the disclaimer, best shown at the bottom of the map.

DISCLAIMERS

"The designations employed and the presentation of material on this map do not imply the expression of any opinion whatsoever on the part of the Secretariat of the United Nations concerning the legal status of any country, territory, city or area or of its authorities, or concerning the delimitation of its frontiers or boundaries."

Here's a step-by-step guide on how to use it according to your tool:

TABLEAU

  1. In the main menu: select Map > Background > WMS Servers
  2. In the WMS Server Connections prompt: select ADD
  3. In the Dialogue box: type the URL as: https://geoservices.un.org/arcgis/rest/services/ClearMap_WebTopo/MapServer/WMSServer?
  4. In the main menu: select Map > Background Layers, then select the map layers to be shown in the view
  5. In the Map Layers: switch on the layers that are needed

POWER BI

  1. In the Visualization pane: select ArcGIS Maps for Power BI icon
  2. In the Dialogue prompt: select ArcGIS Entreprise, type the URL as: https://geoportal.un.org/arcgis
  3. In the Sign-in prompt: enter you Unite ID credentials (Note as a report author, you must first add location data to the map to activate the visual and see the map tools.)
  4. In the top Toolbar: select Get Data and then the common data sources connection to your data (for example excel)
  5. In the Open prompt: select your file from folder and Open
  6. In the Navigator prompt: select the table to import from the file and then Load
  7. In the Fields prompt: from the loaded table, drag and drop latitude and longitude into the appropriate fields (see Figure, right)
  8. In the left-hand side (yellow icons): select the 3 horizontal line (hamburger) button
  9. In the map tool ribbon: select the basemap icons (enable if needed)
  10. In the basemap prompt: select your preferred Clear Map flavor that will be added as a background to your excel geo-enabled data

FOLIUM IN PYTHON

Correct API call to see all layers: https://geoservices.un.org/arcgis/rest/services/ClearMap_Topo/MapServer?f=json

Correct API call for country shapes example: https://geoservices.un.org/arcgis/rest/services/ClearMap_WebTopo/MapServer/109/query?where=ISO3CD%20IN%20(%27EGY%27,%27JOR%27,%27LBN%27,%27PSE%27,%27LBY%27,%27TUR%27,%27AZE%27,%27ARM%27,%27GEO%27,%27IRQ%27,%27IRN%27,%27PAK%27,%27MRT%27,%27DZA%27,%27MAR%27,%27TUN%27,%27SYR%27,%27SDN%27,%27ISR%27,%27AFG%27)&outFields=ISO3CD&returnGeometry=true&f=geojson

Correct API call for admin regions shapes example: https://geoservices.un.org/arcgis/rest/services/ClearMap_WebTopo/MapServer/110/query?where=CNTY%20IN%20(%27KEN%27)&outFields=CNTY,ADM1_Name&returnGeometry=true&f=geojson

LEAFLET for developers

Using Leaflet, copy the sample code below in text editor and save it as html file, or use the url as below:

<head >
<title>Leaflet - UN ClearMap</title>
<!-- Load Leaflet from CDN -->
<link rel="stylesheet" href="https://unpkg.com/leaflet@1.9.4/dist/leaflet.css" crossorigin="" />
<script src="https://unpkg.com/leaflet@1.9.4/dist/leaflet.js" crossorigin=""></script>
<!-- Load Esri Leaflet from CDN -->
<script src="https://unpkg.com/esri-leaflet@3.0.10/dist/esri-leaflet.js"></script>
</head>
<body id="mainpage">
<div id="divmap" style="width: 100%; height: 100%; border-color: black;"></div>
<script>
var map = L.map('divmap').setView([16.263981,-0.027987], 4);
L.esri.tiledMapLayer({url: "https://geoservices.un.org/arcgis/rest/services/ClearMap_WebTopo/MapServer", maxZoom: 18,
}).addTo(map);
</script>
</body>
</html>

Pinia for State Management

· 3 min read
Zoe Laventhol
Full Stack Collaborator @ EuFMD

Using Pinia for state management in Vue apps

🍍 What is Pinia?

Pinia allows you to store data and methods (aka variables and functions) in a central way, and import them to different components throughout your app. This can simplify your code by importing and using variables and functions only in the components where they are needed. This avoids prop drilling and several layers of callback functions!

Here is the documentation. 📖

When to use it?

✅ Use Pinia to store any data and methods that need to be accessible across multiple components. Ex:

  • myData needs to be set in Component.vue, but displayed in SiblingComponent.vue
  • Component.vue needs to fetch data based on some action in that component, but SiblingComponent.vue needs to display, edit or remove the same data.
  • myData and otherData are rendered in different components, but are both used in a third component to calculate some outcome.

❌ Do not use Pinia for data that is only used temporarily, or in a single component. Ex:

  • Component.vue temporarily sets a selectedItem - some function is performed on the selected item, then it clears when a new item is selected.
  • Component.vue uses specificData that never needs to be passed to or used in other components.

How to use it?

Create a store 🏗️

First, create your store file and name it with this pattern: useExampleStore.js

  • i.e. use + YourStoreName + Store
  • so for example, for RMT's disease status data: useDiseaseStatusStore.js

Step-by-step instructions in comments below. You can look at examples in the codebase in client > src > stores.

// ******* STEP 1: import defineStore at the top *******
import { defineStore } from "pinia";

// ******* STEP 2: export your store, and after defineStore, give your store a unique descriptive name *******
export const useExampleStore = defineStore("example", {
// ******* STEP 3: define your data/variables in state *******
state: () => ({
myVariable: [],
anotherVariable: "I ❤️ Pinia",
}),

// ******* STEP 4: define your functions/methods in "actions" *******
actions: {
async myFunction(params) {
// your code...
},
anotherFunction() {
// your code...
},
},
});

// ******* THAT'S IT! Congrats :) *******

Use a store 🧤

Here’s a 🎬 how-to video

Process to use stored data or methods in any component is:

  1. In <script>, import:
    1. the correct store
    2. mapState if you’re using data/variables
    3. mapActions if you’re using functions/methods
import { useExampleStore } from "@/stores/useExampleStore";
import { mapState, mapActions } from "pinia";
  1. For data/variables, add a computed property in your <script>, and use mapState to destructure your stored data:
computed: {
...mapState(useExampleStore, ['myVariable', 'anotherVariable'])
},
  1. For functions/methods, use mapActions in your methods to destructure the stored functions. You do not need to include params, just function names:
methods: {
...mapActions(useExampleStore, ['myFunction', 'anotherFunction'])
},
  1. Then you can use as usual! i.e. Use the variables in your <template>, call the functions, etc., with the same syntax as if they were standard data or methods.
<div>
<select @change="myFunction(value)">
<option v-for="item in myVariable" :key="item.id" :value="item.name">
{{ item.name }}
</option>
</select>
</div>

Set up a testing environment

· 4 min read
Ioanna Papaioannou
Full Stack Developer @ EuFMD

Set up a testing environment with a fake or mock database to test your code without affecting production data.

Introduction

Set up a testing environment where you can use a fake or mock database to test your code without affecting your production data. This is a common practice in development to ensure that your tests are isolated and do not interfere with real data.

Here's a step-by-step guide on how you can achieve this:

I. Create the Database Dump:

  1. Open DBeaver and connect to the database hosted on Amazon Web Services (AWS).
  2. From the list in Databases, right-click on the database you want to dump.
  3. Go to Tools > Dump Database. This will open the database dump configuration window.
  4. Select the specific database that contains the tables you want to export. Check the boxes next to the tables you wish to include in the export and click on Next >.
  5. Choose the folder where you want the SQL file to be saved (e.g., your Desktop).
  6. In the File Name Pattern field, enter a name for your SQL file (e.g., DBeaver_dump.sql).
  7. Click START to begin the dump process. The SQL file will be saved with the name you provided in the chosen location.
  8. Once the MySQL dump is finished (you’ll see a message like: "Task 'MySQL dump' finished at Fri Sep 27 17:42:02 CEST 2024"), manually close the configuration window and confirm the file exists in the specified location.

**Note: If the process fails and the SQL file is not saved in the specified location, request the file from the team and proceed with the next steps.

II. Import the Dump into a Local Database:

1. Create a New Local Database:

  • Open your terminal and navigate to your project’s repository by using the cd command: cd /path/to/your/project/repository

  • Log in to MySQL with the command: mysql -u root -p

  • Create a new database by running:

  CREATE DATABASE local_database_name;

Replace local_database_name with the desired name for your new database. This will be the name that appears in your MySQL database list.

  • Exit the MySQL client by typing: EXIT;

2. Import the Dump into the New Local Database:

  • Import the saved SQL file (e.g., DBeaver_dump.sql) by running the following command:
mysql -u root -p local_database_name < /path/to/directory/DBeaver_dump.sql

Replace /path/to/directory/ with the full path to where the SQL file is located. For example:

mysql -u root -p local_database_name < /Users/yourname/Desktop/DBeaver_dump.sql

To check if it has been succesfull:

  SHOW DATABASES;
USE you_database_name;
SHOW TABLES;

III. Create a New Connection in DBeaver:

  1. Open DBeaver.
  2. Go to Database > New Database Connection.
  3. Select MySQL from the list of database types.
  4. Fill in the connection details as follows:
Server Host: localhost
Port: 3306
Database: local_database_name (the name in the MySQL database list)
Username: root
Password: YOUR_MySQL_PASSWORD

Replace YOUR_MySQL_PASSWORD with your actual MySQL password. You can choose whether to save your password for future connections.

  1. Click Test Connection to ensure everything is set up correctly.
  2. Click Finish to save the connection.

The .env File

The .env file is a local configuration file used to store environment variables in VSCode. It is typically included in the .gitignore file, which means its contents are not pushed to GitHub when you push your branch. This setup ensures that sensitive information, such as database credentials, remains private and is not exposed in version control.

When pushing your branch to GitHub, you don’t need to modify the .env file, as it is ignored by Git.

When connecting to the dump database, ensure that the database connection in your .env file is configured with the correct settings. For the dump database, the .env file should be modified as follows:

DB_HOST=localhost
DB_NAME=local_database_name
DB_PASS=YOUR_MySQL_PASSWORD

Switching Between Databases in DBeaver

To switch between databases, simply comment out the settings for the database you're not using in the .env file by adding a # at the beginning of the relevant lines.

Reverting to the original AWS database:

  1. Disconnect from the local dump database in DBeaver.
  2. Connect to the original AWS database.
  3. Open the .env file and uncomment the AWS database settings, while commenting out the dump database settings.

Before testing your connection and running your code, confirm that you're connected to the correct database. Look for the green tick mark next to the database name in DBeaver to ensure the connection is active and correct.


Data flow in a React application

· 4 min read
Sophie Ogden
Software Engineer @ EuFMD

Understanding Data Flow in a React Application with MySQL and an API

Introduction

Building modern web applications often involves fetching data from a backend server and displaying it on the frontend. In this post, we'll explore how data flows from a MySQL database to a React frontend through an API layer. Whether you're new to data flow or looking to reinforce your understanding, this guide will break down each step in a simple and clear manner.

What We'll Cover

  1. MySQL Database
  2. API Layer
  3. React Frontend
  4. Putting It All Together

MySQL Database

MySQL is a popular relational database management system (RDBMS) that stores data in tables. Each table has rows and columns, where rows represent individual records and columns represent the attributes of those records.

Example: stories Table

example MySQL table

In this table, we have three columns: id, title, and content. Each row represents a story.

API Layer

The API (Application Programming Interface) acts as an intermediary between the frontend and the database. It defines a set of endpoints that the frontend can call to perform CRUD (Create, Read, Update, Delete) operations.

Example API Endpoint

  • GET /api/stories/:id: Fetches a story by its ID.

Node.js/Express API Code

const express = require('express');
const mysql = require('mysql');
const app = express();
const connection = mysql.createConnection({
host: 'localhost',
user: 'root',
password: 'password',
database: 'stories_db'
});

app.get('/api/stories/:id', (req, res) => {
const storyId = req.params.id;
const query = 'SELECT * FROM stories WHERE id = ?';
connection.query(query, [storyId], (error, results) => {
if (error) {
return res.status(500).json({ error: 'Database error' });
}
if (results.length > 0) {
res.json(results[0]);
} else {
res.status(404).json({ error: 'Story not found' });
}
});
});

app.listen(3000, () => {
console.log('Server is running on port 3000');
});

React Frontend

React is a JavaScript library for building user interfaces. React components manage their own state and can fetch data from APIs to update the UI dynamically.

React Component Code

import React, { useState } from 'react';

function Story() {
const [story, setStory] = useState(null);

const fetchStory = async (id) => {
try {
const response = await fetch(`/api/stories/${id}`);
const data = await response.json();
setStory(data);
} catch (error) {
console.error('Error fetching story:', error);
}
};

return (
<div>
<button onClick={() => fetchStory(1)}>Fetch Story</button>
{story && (
<div>
<h1>{story.title}</h1>
<p>{story.content}</p>
</div>
)}
</div>
);
}

export default Story;

Putting It All Together

Let's walk through the complete process of fetching and displaying data in a React application.

Step 1: User Action (React Component)

A user clicks a button in the React component to fetch a story.

Step 2: API Request (Frontend to API)

The React component makes an HTTP GET request to the API endpoint to fetch the story data.

const fetchStory = async (id) => {
try {
const response = await fetch(`/api/stories/${id}`);
const data = await response.json();
setStory(data);
} catch (error) {
console.error('Error fetching story:', error);
}
};

Step 3: Database Query (API)

The API receives the request, processes it, and sends a SQL query to the MySQL database to retrieve the story data

SELECT * FROM stories WHERE id = 1;

Step 4: Data Retrieval (Database to API)

The MySQL database executes the SQL query, retrieves the data, and sends it back to the API.

Step 5: Response to Frontend (API to Frontend)

The API formats the retrieved data as JSON and sends it back to the React component.

{
"id": 1,
"title": "The Adventure",
"content": "Once upon a time..."
}

Step 6: Rendering (React Component)

The React component receives the data and updates its state, which triggers a re-render to display the story.

{story && (
<div>
<h1>{story.title}</h1>
<p>{story.content}</p>
</div>
)}

Conclusion

By understanding how data flows from a MySQL database to a React frontend through an API layer, you can build more dynamic and responsive web applications. This process ensures that users can interact with data seamlessly, making for a better user experience.

Happy coding!

Running A Pilot

· One min read
Sophie Ogden
Software Engineer @ EuFMD

TOM is being piloted in a number of countries including Spain, Bulgaria and Switzerland.

For every pilot, we follow a series of steps to make sure that rollout is smooth for our newly-onboarded users.

1. Add new users

You will receive a list of new users from a specific country to add to the database.

For this we have the TOM Admin tool.

Login credentials are admin@eufmd-tom.com and tom@dmin22.

After logging in, navigate to the "Users" tab in the admin dashboard. Here, you will find a list of already registered users. These users are stored in the production database (db_tompilot), specifically in the users table. Instead of manually adding each user, the TOM Admin dashboard provides a user-friendly interface that automatically adds new users to the database.

tom admin user view


Welcome

· One min read
Sébastien Lorber
Docusaurus maintainer
Yangshun Tay
Front End Engineer @ Facebook

Docusaurus blogging features are powered by the blog plugin.

Simply add Markdown files (or folders) to the blog directory.

Regular blog authors can be added to authors.yml.

The blog post date can be extracted from filenames, such as:

  • 2019-05-30-welcome.md
  • 2019-05-30-welcome/index.md

A blog post folder can be convenient to co-locate blog post images:

Docusaurus Plushie

The blog supports tags as well!

And if you don't want a blog: just delete this directory, and use blog: false in your Docusaurus config.